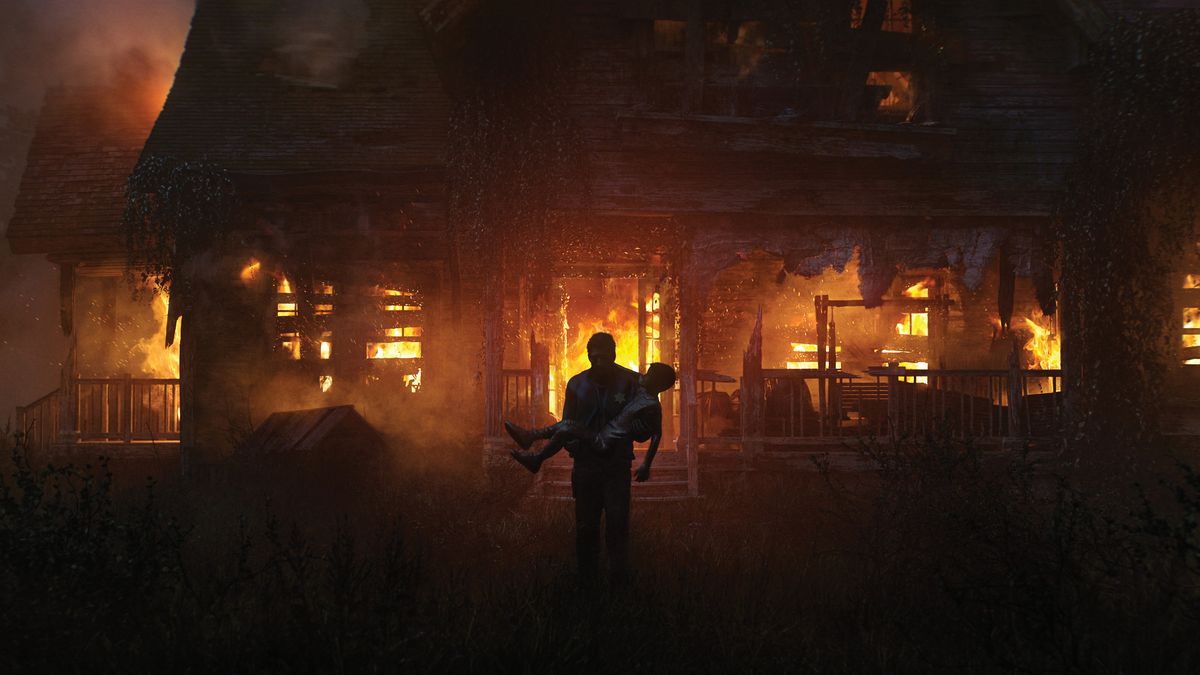
The shot I’m going to show you in this Blender tutorial is part of a series from my personal concept art project Niko. It’s from the final scene, where we finish the story of an alien child who has been rescued by the local sheriff.
With this image, it was vital to convey the end of the story and all the emotional charge that had built up. I thought nothing would be better than to go with all hell breaking loose in the finale, so I chose to have fire as the main motif in the last scene. To make the fire as believable as possible, I considered all the layers and the layering of the scene through the depth of space, and the damage it would cause to the building and its surroundings.
I’ve been thinking about switching to Blender for a long time, and this project seemed to be an ideal opportunity for me to try it out. It’s amazing what the Blender Foundation has achieved in developing its software in the last several years. Right now, it’s the closest thing to perfect for creating concept art, and on top of that it’s completely free. If you’re interested in trying Blender for yourself, check out our guide to everything you need to know about Blender, as well as our Blender 4.0 review where we look at the software’s latest version.
Nenad is an environment concept artist who is passionate about cinematic narrative. Through his job, he has influenced the visual storytelling of films, and been able to transform written words into complex and engaging worlds.
How to create atmospheric concept art in Blender
I’m going to take you step by step through my process for creating this shot in Blender. If you’d like to follow the tutorial for yourself, head here to download the assets you’ll need.
Before starting, make sure to find good references for what you want to achieve as these will save a lot of time and improve your work. Look at the references occasionally, just so you don’t forget what you’re aiming for. Take your time to make a believable 3D model, as it will be a good foundation for the next steps. Use VDB elements or PNGs to add fire, smoke, or other effects. Your render will serve as a good base for post-production, where you can perfect the surfaces from 3D and add photo elements for extra detail.
01. Creating realistic initial models
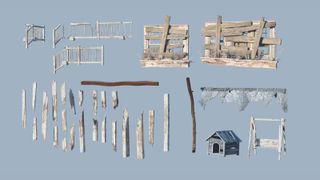
The first step in making a believable scene is to develop representative models of the story and design you have in mind. Take your time and do good research, as it will help reduce your time and struggle.
In my case, the challenge was to create an old, abandoned house that had been long neglected and left to decay to the elements. I was creating a lot of broken wood, and the key here was to make sharp, splintered parts. You can make wood planks with just a simple box, subdividing it and pulling vertexes at the ends to create sharp edges.
02. Making weathered house textures
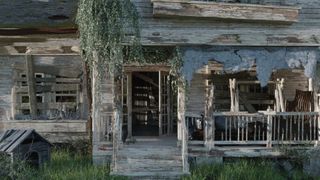
The next step is to build weathered, faded and crunched textures. After sitting in the sun and other natural elements, the wood’s painting has been affected, so the key is to find a good blend between chipped paint and the original wood that lies underneath it.
For this, I looked at the Blender Guru’s YouTube channel and his tutorial on creating an abandoned house. There you’ll find everything you need to know for this particular process. For the textures I have, I use Quixel Megascans as it has a wide range of materials, but you can also use any other textures or, even better, your own photos.
03. Researching your vision
In order to build a convincing fire, you have to prepare a reference board with good photos to give yourself a target to aim for. You’ll soon realise that for every decision you make in the scene, you’ll need a reference example from real life, as thankfully not all of us have had the misfortune to experience this kind of fire first-hand.
Take your time and search Pinterest or Google for any photos that will help you achieve the overall effect, as well as all the little details to push the realism of the scene to a new level.
04. Lighting the fire effect
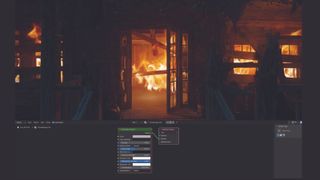
To get a good lighting base for the fire effect, I used VDB Fire from the CloudScapes V2 library you can find on Blender Market. It’s an amazing add-on with a lot more than just fire elements that you can use in your projects. VDBs are simulated volumetric data that realistically resemble effects. They are 3D files, so you can play with them as you wish.
You can also use a fire image and import it into Blender using ‘Images as Planes’, while making sure that the file is a transparent PNG with an Alpha channel. Make a Principled BSDF material, connect the image to the Base Color slot, and connect that same image to an Emission slot. You can also add in a regular light using the colour of the fire for some additional illumination.
05. Adding burnt wood for more detail
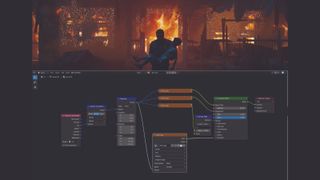
To add an extra layer of realism and detail to the shot, I also rendered a separate pass in Blender that used some burnt wood as the Emission material. This was later used for blending on top of the base final render for the post-production work in Affinity Photo, being added to the edges of windows and doors here and there where the fire caught the wood elements.
A useful hint is that you can render just a region of an image. In Object mode press Ctrl+B and then select the part of the image that you want to render. This means that you don’t have to re-do the whole scene just for one small part.
06. Partnering smoke with fire
There’s an old saying: where there’s fire, there’s smoke. Smoke can be used as a great graphic element to lead a viewer’s eye away from or into an image. Remember to always use it visibly and in logical places within your scene.
To create your own smoke, find some good cloud images, with photobash.co a great resource for royalty-free images.
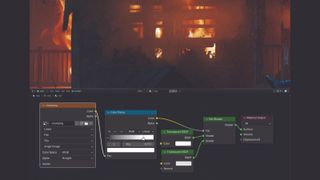
Back in Blender, add a cloud image as an ‘Image as Plane’. For the material, make a Mix shader with a Transparent BSDF in the upper and a Translucent BSDF in the lower Mix channel, mix it with a PNG texture with a transparent background, and connect it to the Factor input. That way, your smoke will catch the light and all of the goodness that’s being projected from the environment.
07. Photobashing your fire in post-production
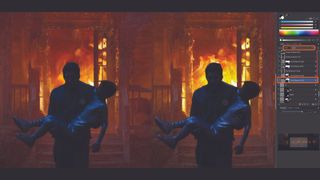
After your final render is all wrapped up, we can then move on to a little post-production to perfect our scene and make it more natural. VDB Fire came out great as a base, but it needs some additional love to get it just right. I’ve used images from the two Fire and Flames packs on photobash.co to accomplish this, but you can use any other images of fire that you think are suitable.
The key to getting this just right is to match the brightness and colour to a real-life fire. In Affinity Photo I used a JPEG of fire with the Screen blending mode, but feel free to experiment with blend modes, or perhaps Photoshop’s Linear Dodge for a bit of a different result to bring an extra layer of detail.
08. Creating the intricate embers
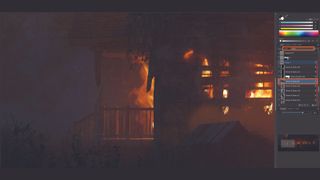
Similarly to adding the fire, you can bring in embers flying from the hotspots. These are again blended with the Screen mode, with one addition. Go to the Live Filters – or use Smart Optics for those with Photoshop – then Motion Blur, and rotate the blur to the desired angle and strength you want the embers to fly. A mask can remove blur from some parts. If you’re not satisfied with the amount of blur later on, you can always come back and change it thanks to the Live Filters.
09. Using a bloom effect
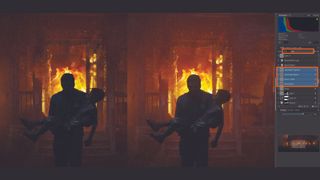
The last step is to add subtle but essential touches, such as light bloom and glow effects, to the image. Bloom occurs when we have a bright light source, which in our case is the fire. That light usually bleeds over the surrounding dark areas of the image that are in front of the light.
To achieve this effect, fill a new layer with black, then use a soft, round brush with a lower Opacity and a reddish color to paint over the places where you have a strong light source. Use the Add blend mode for that layer, and if needed reduce the Opacity.
For an extra layer of bloom, copy all the layers, merge them into one image, add a strong Gaussian Blur of around 120-140px, put it in the Lighten blend mode, and reduce the Opacity.
Get more tutorials in 3D World
This content originally appeared in 3D World magazine, the world’s leading CG art magazine. 3D World is on sale in the UK, Europe, United States, Canada, Australia and more. Limited numbers of 3D World print editions are available for delivery from our online store (the shipping costs are included in all prices). Subscribe to 3D World at Magazines Direct.
