Jump to the quick list↴
1. The Cricut workflow
2. What tools do I need?
3. The Cricut mat
4. Cricut cutting machines
5. Heat press machines
6. Cricut jargon buster
7. Cricut resources
Cricut FAQs
If you’re learning how to use a Cricut machine, then you’ll know that it isn’t too difficult once you know which machine is right for you, and understand the core principles of Cricut’s approach to digital crafting. In this Cricut beginner guide, we’ll bust some of the crafting jargon, explain the tools that we think you’ll need to get started, and break down what each of the best Cricut machines can do to help you achieve the best results for your brand or business.
Whether you’re a hobbyist or a professional maker, the Cricut range can help your creative ideas come to life. Our Ecommerce writer has made mastering Cricut her main goal for 2025, with the aim to DIY her Wedding stationery. One of the best things about learning Cricut for beginners is that you don’t have to be well-versed in digital design to create something beautiful, yet you still have the freedom to work using your own custom designs.
If you didn’t already know, Cricut is actually pronounced like cricket (the bug/sport) and not cry-cut as we’ve been calling it in the CB office. Also, there are different Cricut machines for almost everything, from heat-pressing hats to laser engraving on wood. That’s why it’s important to determine which machine is best for your needs, and we’re here to help. Let’s dive into everything you need to know to get started in Cricut crafting.
How to use a Cricut: the workflow
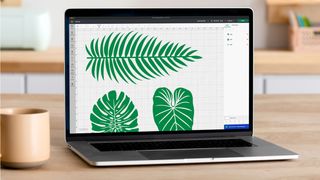
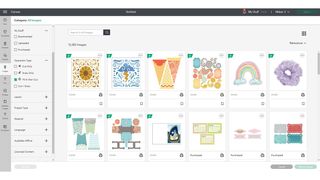
With every Cricut machine, you’ll get access to the free Cricut Design Space app (it’s on our list of the best software for Cricut). It’s available on desktop and mobile, which is super handy if you’re planning to use it on your iPad. For beginners, we recommend making use of the abundance of ready-made and customisable design files to get you started. Some of these are free but others are available to purchase, but it means you don’t have to spend time creating a design yourself if you’re eager to just get started.
If you plan on creating something a bit more bespoke, then it’s a good idea to draw your own shapes or type words directly onto the Canvas on Cricut Design Space, or there’s also the option to use third-party programs such as Adobe Illustrator or Serif Infinity Designer to create your own design. It is recommended to save your designs as an SVG (Scalable Vector Graphic) file within the app, as this can then be scaled within the Canvas without affecting the quality.
Design Space offers access to a host of helpful tutorials and templates for beginners to Cricut, it can also act as a library for keeping all of your designs in one space. As we mentioned, Cricut Design Space is totally free to use, but if you want to enhance your experience, then there’s a paid subscription called Cricut Access which will unlock the entire Cricut Library of premium images, fonts & projects each month.
Once you’ve either chosen your ready-made design, or uploaded your unique design onto the Canvas, the next step is to resize and move it into place, and then click the ”Make It’ button. You will be given the option to duplicate your design to create multiple copies of it, as well as mirror it if you are working with iron-on or infusible ink materials (more on this later).
How to use a Cricut machine: the tools
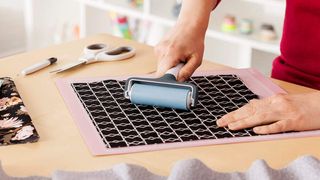
If you purchase a Cricut machine as a bundle, then you’ll usually be provided with a good amount of tools and materials to get you started. The range of tools required for your project will vary depending on what you plan to create, and which Cricut cutting model you have. All cutting machines come with a Premium fine-point blade (or a Performance fine-point blade if you purchase a Cricut Venture).
Additional tools and accessories can be purchased from the Cricut website, as well as various retailers including Amazon and Hobbycraft in the UK, as well as Michaels and Walmart in the US. See our guide to the best Cricut accessories for an idea of the tools you can buy from new blades and pens to handy storage cases.
Some of the tools you’ll likely need to buy down the line include replacement blades, engraving and debossing tips, plus extra pens. We have a guide to the best Cricut blades for each craft machine if you need some recommendations. But for now, the essential things you’ll need in order to get started will be:
- A Cricut machine and a device capable of running Cricut Design Space, such as a computer, laptop, smartphone, or tablet.
- A cutting mat, to apply your materials to before cutting the design. The Cricut mats are printed with a grid to help you position your material, and have an adhesive layer to ensure that your material does not move around during the cutting process.
- A weeder tool, which helps you to remove the excess material from around your design after it’s been cut.
- A scraper, to properly adhere transfer tape to your design or remove excess material from your mat.
- A brayer, which is a roller tool that helps to eliminate wrinkles and bubbles and also fully adhere your material to the mat.
- A standard pair of scissors, to trim your materials down to size.
- A printer, should you have a machine with the Print then Cut function. You will print out your design along with the registration marks that your machine will read before cutting.
There’s also an official Cricut cheat sheet explaining more Cricut tools and terms, along with a guide to their most popular materials.
How to use a Cricut: the mat
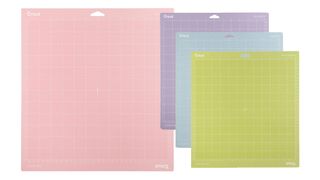
A Cricut cutting mat is an essential tool that you will need if you plan to use anything other than Smart Materials with your machine. In essence, each mat has a sticky layer on it that enables you to adhere to your material, holding it in place once you’ve fed the mat into the machine to begin cutting and drawing.
There are four different adhesive levels to choose from. The blue mats are the lightest grip, designed for more delicate materials like paper. The green mats are standard grip and are intended for materials such as sticker paper or heavy cardstock. The purple mats have the strongest grip, for use with materials such as leather and corrugated paper. And finally, the pink mats are specially designed for cutting fabric, but can also help to cut materials like crepe paper.
• Top tip 1 Don’t throw away the plastic cover that comes with the mat! These are required to stop dust or other contaminants from becoming stuck to the sticky surface. One thing that may not be obvious is that there is a specific side of the cover that should be touching the surface of the mat.
• Top tip 2 Working out the correct side each time can be tricky and time-consuming, so I recommend placing a little sticker or writing something in permanent marker so you can easily stick the correct side down each time.
If you’re unsure which mat you need for your project or machine, then Cricut has a helpful cheatsheet, that details which mat will be the most suitable for the material that you’re cutting.
Most new Cricut machines launched after 2021 can make use of Smart Materials, available from Cricut, which don’t require a cutting mat. They are simply fed into the machine on their own and the machine will work its magic.
Which Cricut machine do I need for cutting?
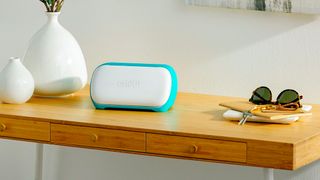
Cricut offers a variety of different cutting machines for varying levels of ability and budget requirements, however, it also provides a range of other machines, including mug and heat presses. Below, you’ll find a breakdown of some of the machines they offer and what they are used for.
Cricut Joy
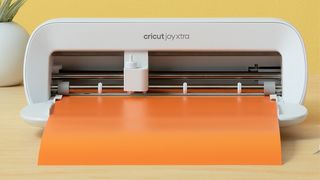
The Cricut Joy range provides the most compact and low-cost of their machines. This consists of the Cricut Joy, which has a max cutting area of 4.5″ x 6.5″, and the Cricut Joy Xtra, which can cut projects in sizes of up to 8.5″ x 12″, when cutting on mats. Along with the larger scale cutting area, the Joy Xtra also offers the Print then Cut function alongside the Joy’s functions of fine point cutting, fabric cutting, drawing and foiling.
These machines are best suited for smaller scale designs, although by using smart materials it is possible to cut a single design to a length of up to 1.2m, or 6m if you are cutting multiple designs. A machine from the Joy range would be ideal for beginners who want to get to grips with Cricut capabilities, or for those who are creating smaller-scale projects.
Read our Cricut Joy review for more details on how this small, portable cutting machine performs.
Cricut Explore

The Cricut Explore 3 is a level up from the Joy series, both in size and capabilities. It has a maximum cutting size of 12″ x 24″ when using a mat, or up to 3.6m with Smart Materials. On top of the Joy Xtra’s capabilities, it can also use the scoring stylus and the deep point blade, which is needed when cutting thicker materials. It also works with the bonded fabric blade.
Cricut Maker
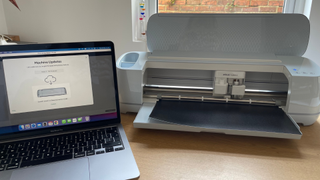
The Cricut Maker 3 lives up to its name by offering a myriad of different functions. It comes in the same dimensions and has the same max cut size and features as the Explore 3, but gives more creative freedom by having the capability to use the knife blade, rotary blade, wavy blade, perforation blade, engraving tip, embossing tip and single or double scoring wheels. So you’re able to create a range of different things with just one machine.
Read our Cricut Maker 3 review for more information on Cricut’s best-selling digital craft machine.
Cricut Venture
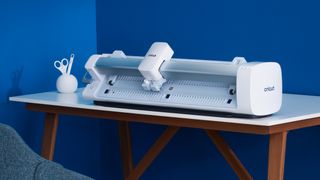
The Cricut Venture takes crafting to a whole new level. This is Cricut’s first wide-format professional cutting machine. It uses the same tools as the Explore 3 but can cut single images of up to 3.6m, and repeated designs up to a massive 22.8m. It can also cut on mats of up to 24″ x 28″. Cricut released a new Venture model in 2024, with newly updated materials and accessories.
The Venture features a whole host of extra features too, including a vacuum to hold your Smart Material in place, and an Automatic Cutoff blade, which cuts your material off of the roll when it’s finished a long cut.
For smaller designs, you can also use the guide at the front of the machine, using the Cutoff blade to trim the material off by hand. Along with the launch of the machine Cricut also released their new Performance fine point blade, which offers a longer blade life that is critical for a machine that is designed to cut on a larger scale.
How to use a Cricut: heat press machines
Cricut offers a range of heat presses that enable you to print mugs, hats or fabric. These range from small one-handed devices to large professional machines, and each is designed to make creating designer products as easy as possible.
If you’re working with one of Cricut’s new Bluetooth-enabled heat presses you’ll require the Heat Press app. This enables you to select your heat press, the transfer material, and the base material you are applying your design to. The settings are then shared with your heat press so that it prepares itself automatically, it is then a simple case of following the instructions detailed in the app to complete your project.
For earlier models, you will instead use the Cricut Heat Guide to input the relevant information. This will give you the correct temperature and timing needed to transfer your design successfully. We have a detailed guide to the best Cricut Heat Press machines, but below I outline the core machines you should keep in mind.
Cricut EasyPress
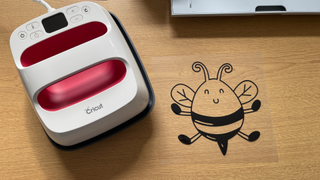
The Cricut EasyPress range compromises of manual heat presses in a variety of sizes and features. The machines in this range include the EasyPress Mini, EasyPress 2 and EasyPress 3.
As the name suggests, the EasyPress Mini is the smallest of the range and is designed for small or awkwardly shaped blanks, so you can still achieve a good transfer on items like shoes and stuffed animals.
The EasyPress 2 and 3 both come in sizes of 9″ x 9″ and 12″ x 10″. These are designed for larger-scale projects such as t-shirts and tote bags, enabling you to press the fabric first, and then heat your transfer so that it adheres correctly.
The main difference between the two most popular Cricut heat presses is that the EasyPress 3 automates some of the process by linking to the Cricut Heat App, rather than referring to the Cricut Heat Guide and manually entering the temperature and pressing time.
Cricut Autopress
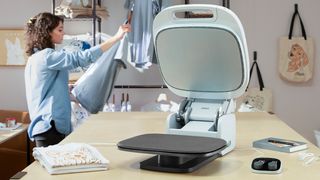
The Cricut Autopress is a professional heat press made for home use. It has a pressing size of 15″ x 12″ and features a ‘Zero Effort’ closure which ensures that it is easy to open and close, and auto-releases once pressing is complete. It automatically adjusts its pressure for materials up to 2 inches thick, ensuring that everything stays in place.
We have a detailed feature on this large heat press, called ‘Cricut Autopress: everything explained‘ that’s well worth a read if you’re looking to turn your craft hobby into a small business.
Cricut Mug Press
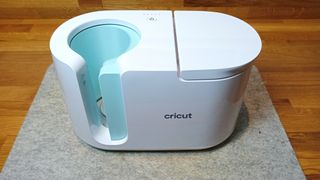
The Cricut Mug Press helps you to apply professional and dishwasher-proof designs to mugs. It works with Cricut’s Infusible Ink transfer materials and infusible ink pens and requires no set-up as the press heats to the correct temperature automatically, so it is a simple case of placing the mug in and pressing the button to begin the transfer process. Read our Cricut Mug Press review for more details.
Cricut Hat Press
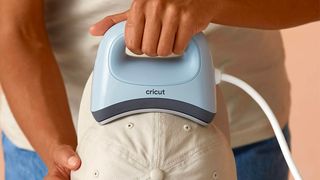
The Cricut Hat Press works in much the same way as the other hand-held Cricut heat presses, but has a curved heat plate and comes with the Cricut Hat Pressing Form to achieve the best results when printing your design onto hats. The Hat Press uses the Cricut Heat app to automate temperature and time settings.
How to use a Cricut: jargon buster
If you’re a beginner to using Cricut machines, or any kind of crafting machine in general, then you’ll have likely come across a few of these terms. Digital crafting can be tricky to navigate if you don’t understand a lot of the jargon as a beginner, but don’t fret! We’ve broken down some of these terms and what they mean below.
- Linetype is the term that Design Space uses for you to confirm what you intend the machine to do for any particular line. Examples of this would be to cut, draw or score.
- Weld is a tool on the Canvas that allows you to simplify a design, allowing you to join shapes together into a single image by removing any overlapping lines.
- Attach is another tool on Canvas, it allows you to lock parts of your design together so that the lines stay relative to each other, much like grouping layers in Adobe Illustrator. It also locks in your Linetype selection.
- Layers are the different elements that complete the design when put together. You would use layers when cutting multiple colours for one design.
- Transfer Tape is an adhesive tape used to remove cut designs from their backing without disrupting them, before weeding and placing them onto the intended surface.
- Burnish means to rub the surface of transfer tape. You would burnish using your hand or a scraper tool when applying transfer tape over a material to ensure that the design is fully adhered to the tape.
- Vinyl is a material with adhesive backing used to create decals and stickers. You can use permanent or removable vinyl depending on the result you want from your finished product.
- Iron On, AKA Heat Transfer Vinyl/HTV, is a material you can cut on your Cricut machine that has a heat-activated adhesive backing that fuses your design to fabric.
- Carrier Sheets are the shiny heat-safe transfer tape that comes attached to Iron On material.
- Blanks are the items that you are applying your design to. Examples of these would be T-shirts or mugs.
- Firmware is the operating system of the machine. As with any device with an operating system, it’s important to make sure that you update the firmware regularly, to make sure that your machine is operating to its full potential.
How to use a Cricut: resources
To help you get the very best results from your Cricut machine, we highly recommend that you take a look at the following resources for tutorials, top tips, and reviews. Of course, we have our own guides too, including our roundup of the best Christmas Cricut ideas and the best Cricut projects.
There’s a YouTube channel called Cricut Learn which will likely become your go-to for guides, workshops, and machine education. This can also be easily accessed via the Cricut website or through the Design Space app.
There’s also the Cricut Blog and official Cricut YouTube channel to help beginners to Cricut learn skills, but there’s also a huge range of tutorials and reviews about Cricut products from other creators on YouTube that are worth checking out too. Some YouTubers that we love for their in-depth and helpful content are: Creative Ramblings, Kayla’s Cricut Creations, Angie Holden, and TheFoiledPlan.
The main thing to remember when you begin your Cricut journey is that, like learning any new process, it is going to be a learning curve. Sometimes things won’t work the way you want them to, or the cut won’t go through the first time, but don’t be disheartened, this is all part of the learning process and happens to everyone. Take your time when trying a new technique, do a little research to give yourself the best chance of succeeding and, most importantly, have fun with it!
How to use a Cricut: frequently asked questions
What does a newcomer to Cricut need?
If you’re completely new to Cricut then I’d recommend getting the Cricut Explore Air 3 as your beginner machine, along with the Essential Tool Set, Brayer and a mix of Smart Materials. Cricut always has a number of bundles that package a machine with tools and materials and these are great value. Read our best Cricut Explore 3 bundle deals tracker for the latest offers.
Is Cricut difficult to learn?
Not really, the main workflow and use of a Cricut machine is easy to pick up, and Cricut has a lot of free pre-made projects to try. Cricut does its best to ensure most machines are a one-button process. The more you use a Cricut, the more you learn how to create your own projects on Design Space.
Can I earn money from Cricut?
Yes, you can earn money from Cricut in a number of ways. The obvious way to make money from a Cricut is to sell your creations on Etsy and other online stores, but you can also earn money from selling your SVG files and designs for others to use, whether as downloads from Etsy or in through Cricut Access. Read our guides to how to make money with Cricut and how to sell on Etsy for more details.
Which Cricut is best for beginners?
I would suggest the Cricut Explore 3 is ideal for beginners, as it can do a lot the more expensive Maker 3 can do but costs less. While it isn’t as fast as Maker 3 and has less accessories, for beginners it can do everything you need, including cutting, drawing, debossing and more. If you don’t need Smart Materials and are happy to use a cutting mat, I would also suggest picking up an old Cricut Maker – it’s powerful, uses are the new tools and blades, but needs a mat, so is a little messier.
Does Cricut use ink?
No, it uses pens that slot into its blade slot. Cricut is not a printer, and even though it can be used with heat presses it doesn’t transfer ink in exactly the same way as the best sublimation printers. Instead of ink pots it uses pens, as well as heat transfer vinyl.
What kind of computer do I need for Cricut?
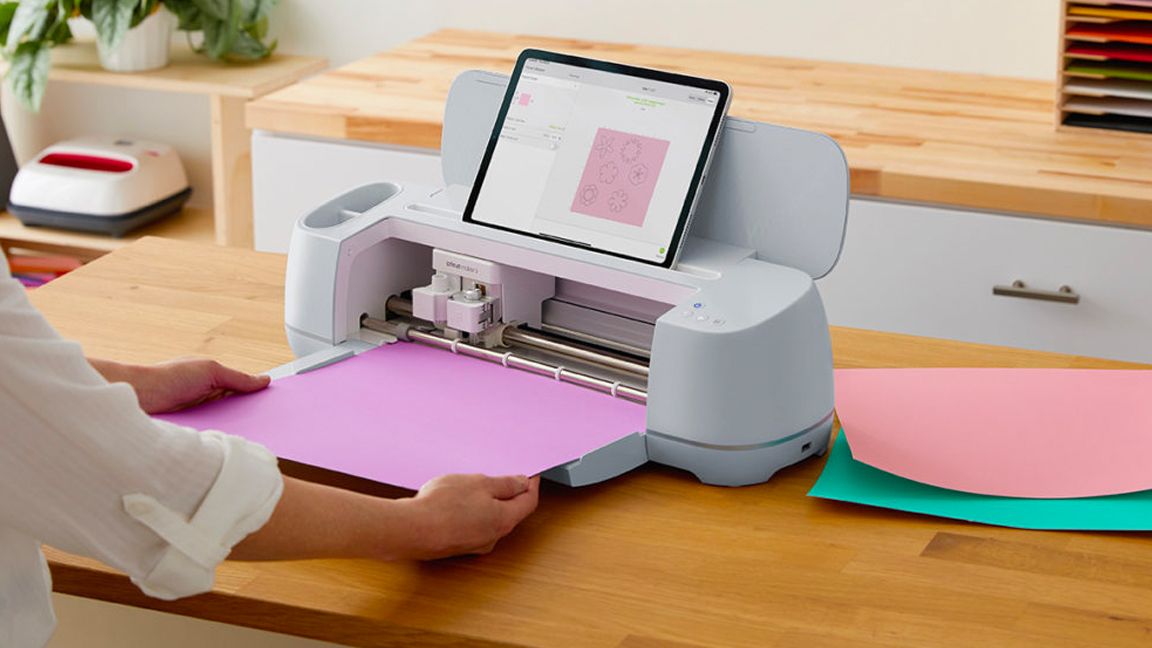
These days Cricuts and the Cricut Design Space app work with all computers, smartphones and tablets, whether you’re using Apple, Android or Chromebook. In my experience, however, Design Space works best with iOS and there’s even a slot on the top of new Cricut machines for an iPad. Read our guides to the best tablets for Cricut, the best laptops for Cricut and the best Chromebooks for Cricut for lists of recommended devices.
Is Cricut Design Space free?
Cricut Design Space is the brand’s own design app, and its free. All Cricut’s use this app to create, cut, draw and print designs. You will have to pay for Cricut Access, the monthly subscriptions service for pre-made projects, fonts, and offers. There’s a free 30-day trial to Access that’s well worth using when you first get a Cricut machine.
